A Hands On Demonstration of HMI Design [WorldSkills 2024-Lyon]


A Human Machine Interface (HMI) is a user interface or dashboard that connects a person to a machine, system or device. This term can be technically applied to any screen that allows the user to interact with the device it used in the context of an industrial process.
In industrial settings, HMIs can be used to:
Visually display data
Track production time, trends, and tags
Oversee KPIs
Monitor machine inputs and outputs
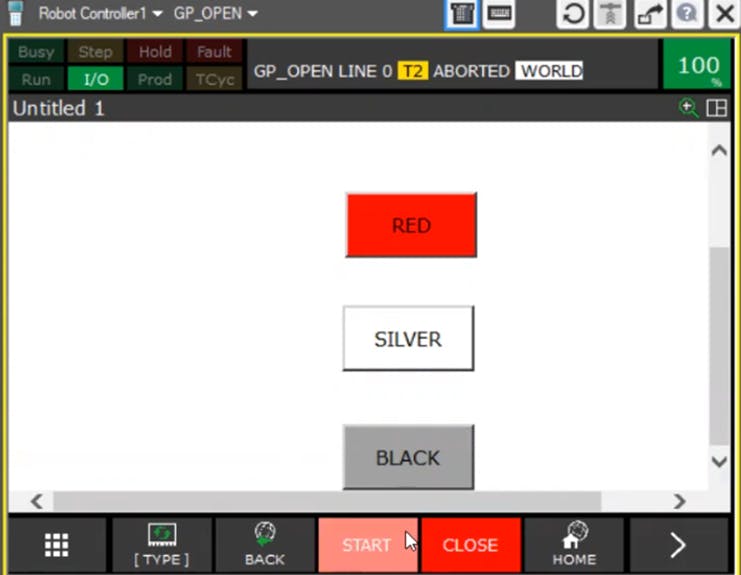
This demo will show you how to make a basic HMI for different components like Red, Silver, Black and a start button. (Software required for HMI are MS SharePoint And Fanuc iPendant Control)
Step 1: Open MS SharePoint Design in your system

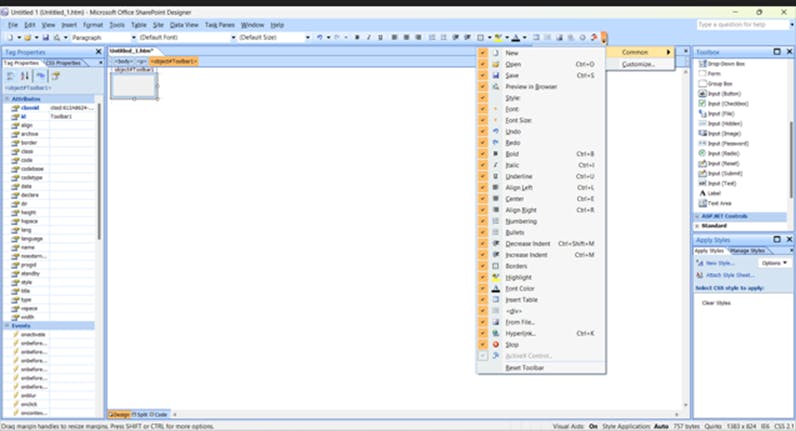
Step 2: Click on the Active X Control Option on the toolbar option in case you don’t find this option go on Toolbar options >- add or remove option -> common after that -> active X Control Option from there
Step 3: After that click on the Active X Control a dialog box will appear with the Fanuc iPendant options.

Step 4: Click on the Fanuc iPendant ToggleButton Control option and click ok

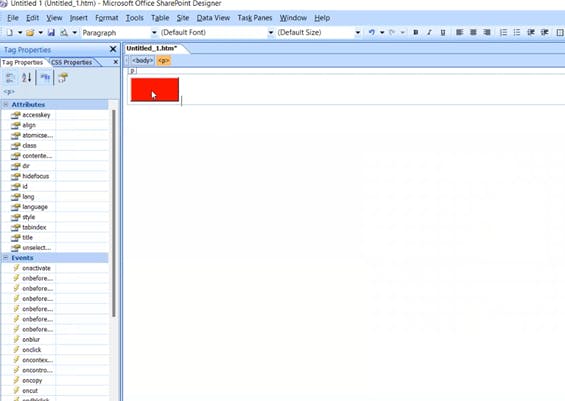
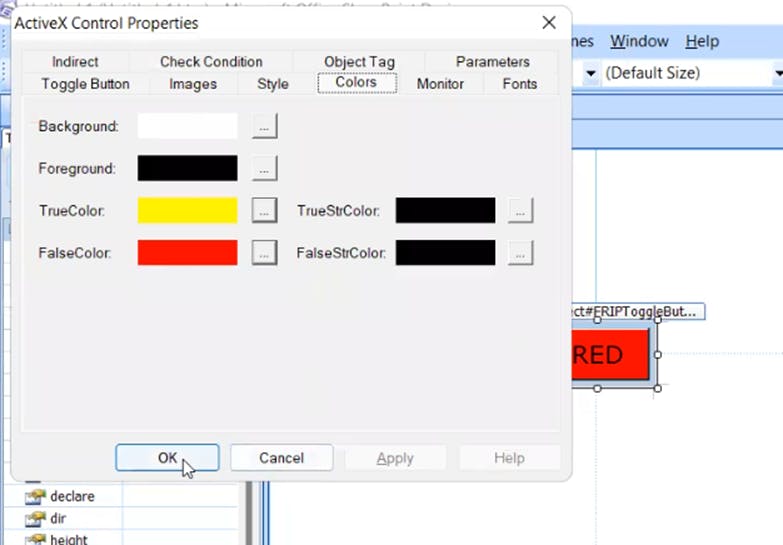
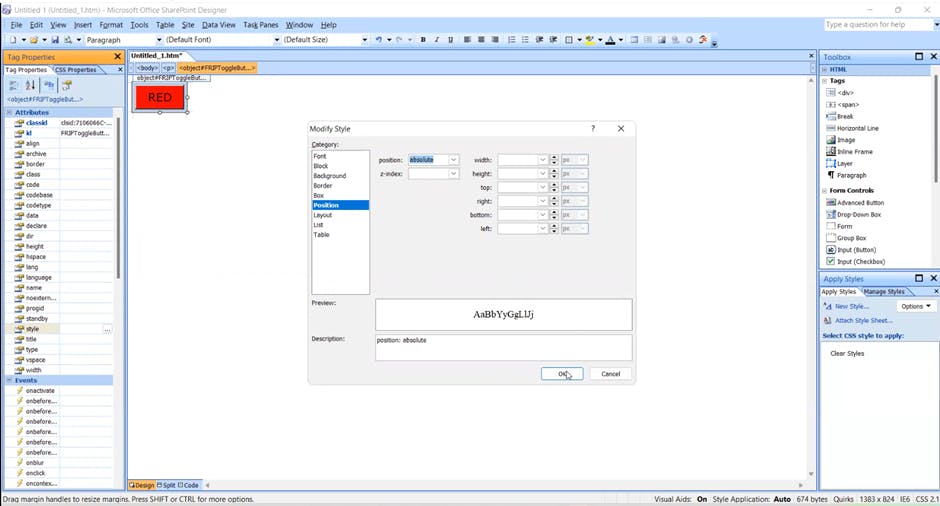
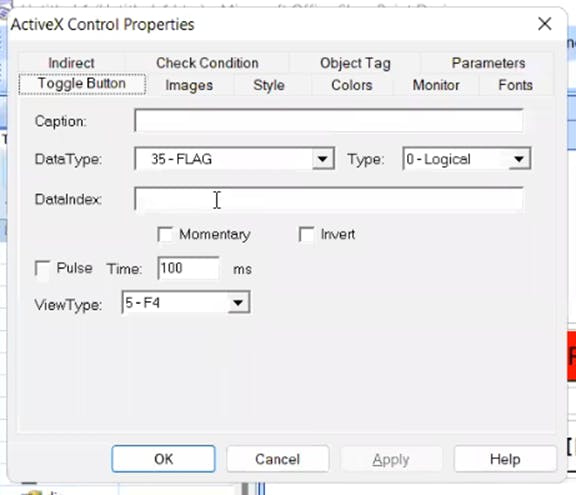
Step 5: This red box will appears first after that open the property box and keep Caption as Red (As it is for RED Component) Select the DataType as FLAG DataIndex as 1 [Flag[1] = 1]. To Set a True Colour And False Colour for your Red Component For a change it’s position go on the style >- Position>- Absolute

Step 6: Repeat step 5 for SILVER and BLACK Components
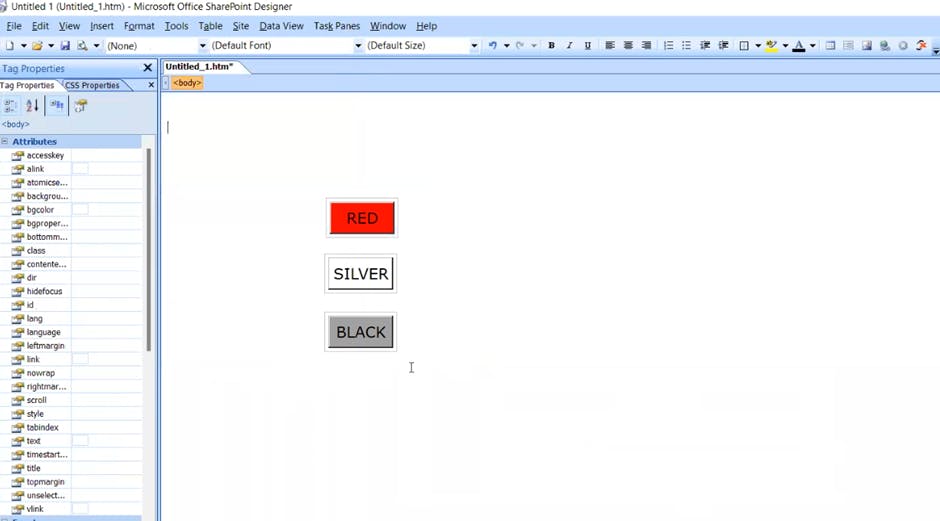
Step 7: Repeat step 5 for START Button also but select the ViewType as F4

Step 8: Save the file in the Documents >- MyWorkCells >- Current workcell file >- Robot 1 >- UD1 >- *filename.*STM (TASK1.STM)

Step 9: Upload the file in the Teach Pendant Menu >- Files >- File >- Util >- Set Device >- USB Disk UD1 >- Load >- Yes

Step 10: On Teach Pendant Go on Menu >- Next >- Browser scroll down you can see your HMI file Loaded Successfully